

THE PUMPKIN CIRCLE STORE
VIDEO AWARDS & REVIEWS
EN ESPAÑOL
EDUCATIONAL STANDARDS
GROWING PUMPKINS
LINKS
OTHER FILMS BY G. LEVENSON
CONTENTS
HOME
   |
PUMPKIN CIRCLE FILM SYNOPSIS THE PUMPKIN CIRCLE STORE VIDEO AWARDS & REVIEWS EN ESPAÑOL EDUCATIONAL STANDARDS GROWING PUMPKINS LINKS OTHER FILMS BY G. LEVENSON CONTENTS HOME |
›ACTIVITIES |
| |
||
Plant a Pumpkin Seed ... Watch it Grow
 |
Whether it is Spring or Fall, it is easy and fascinating to plant pumpkin seeds indoors and watch them sprout into seedlings. It takes 8-10 days for a pumpkin seed to become a young plant. For most of that time, the seed is growing down and producing roots. On about the 7th day, two fat, fuzzy, oval baby leaves break through the soil. Within a few more days, a third leaf, with wrinkles and jagged edges, appears in the center of the young plant. Here's what you will need to make a root view chamber. |
| MATERIALS: (1) Potting soil (2) Pumpkin seeds, (3) Half gallon milk carton, (4) acetate (overhead transparency) or clear plastic, (5) Waterproof glue, (6) Wooden block or book. | ||
| DIRECTIONS: 1. Cut off top of milk carton; rinse the carton with soap and water. 2. Cut a "window" flap on one side of the milk carton, leaving flap attached at the bottom. The flap should be about half an inch in from the edges of the container. Leave the flap attached at the bottom so the roots can be covered when not observed. 3. Cut acetate or plastic for a "window". Place inside carton and glue. 4. Loosely pack moist potting soil to one inch below the top of the "window". Plant one seed, flat side against the top center of the "window" about 1" deep. |
||
|
|
||
Pumpkin Sauce ...
Delicious and easy to make!
Pumpkins find their place across the menu -- breakfast, lunch
and dinner and dessert -- whether its pancakes, muffins, seeds for snacking,
hearty soup, stuffed pumpkin or tasty pie. And now ... introducing ... pumpkin
sauce. 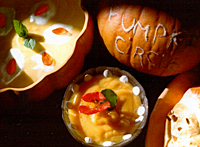 This
is the unknown cousin of apple sauce -- a side dish that can go with any meal,
delicious as a spread on bread and, yes, even as an ice cream topping! Or add
a little milk and slurp it up like a hungry kitten. Here is a food for all times
of day, all times of year, and nourishing all parts of the body -- from the
eyes to the inner dark places. You decide. Here's the recipe -- should you wish
to replicate this simple delight:
2 Cups of pumpkin puree (from a fresh baked pumpkin; that canned
stuff just doesn't hit the mark when it comes to flavor).
1/4 cup apple sauce or grated apple.
juice of half a lemon grated lemon rind of 1/2 a lemon
1/4 teaspoon of cinnamon (heaping)
1/4 cup of honey.
Mix it all together and what have you got? .... Pumpkin sauce!
Pumpkinly yours, George Levenson
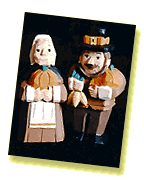 The
Fall harvest not only brings pumpkins. It also brings pumpkin paraphernalia:
pumpkin china, pumpkin pencils, pumpkin figurines, pumpkin napkins, pumpkin
puppets, pumpkin earrings, pumpkin stationary, pumpkin pencil sharpeners, pumpkin
candles, pumpkin t-shirts, pumpkin hats, and even pumpkin toothbrushes - an
entire world of pumpkin gizmos, gifts and gadgets. They are manufactured all
over the world, and some are carefully displayed in high-priced antique stores.
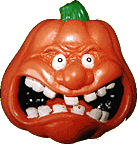 Invite
your students to become museum curators, collecting and displaying their pumpkin
paraphernalia in their very own Pumpkin Museum. Turn them into treasure hunters
and encourage them to ask relatives and friends to look through their attics
and basements for anything and everything related to pumpkins. Ask the owners
of local shops and antique stores to provide unusual pumpkins items on "loan."
Don't forget about original pumpkin art - paintings and sculptures of pumpkin
themes produced by members of the class. We have museums for baseball, rock
and roll, and the automobile. Why not pumpkins? Here is what you will need to
create the pumpkin museum.
MATERIALS: (1) a corner in a room or hallway, (2) a table or bookcase, (3) drawing paper or grid paper, (4) a ruler, (5) pencil or pen, (6) a measuring tape, (7) 5 " x 8" index cards, (8) one grand collection of pumpkin paraphernalia, brought together from stores, attics, basements, and created by the pumpkin imagineer.
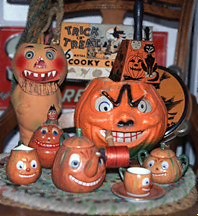 DIRECTIONS:
1. Find a museum location and measure its length and width.
2. Plan your display by sketching the space on your paper. Use scale to indicate
size.
3. Place your collection on a table. Think about where you want to place each
object in your exhibit. Don't make the space too cluttered.
4. Once you know where you want to place the objects in your exhibit, draw them
on your pumpkin display plan.
5. Be sure to make up a title for the exhibit .
6. Write display signs for your collection. For the more interesting items,
include brief descriptions and information such as where the object came from,
its age, its use, and monetary value.
7. Where possible, make part of the display interactive. For example, ask people
to make designs with a large bowl of seeds; ask visitors to guess the weight
of a large pumpkin.
8. Take a photo of the exhibit and keep it for next year.
PUMPKIN CIRCLE FILM SYNOPSIS • PUMPKIN STORE
• VIDEO AWARDS & REVIEWS
• EN ESPAÑOL
EDUCATIONAL STANDARDS
• ACTIVITIES • GROWING
PUMPKINS • LINKS
CONTENTS • HOME
©1998 - 2007, George Levenson
2301