|
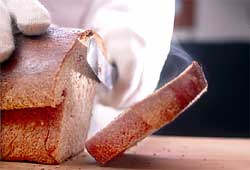
How to Bake A 100% Whole
Wheat Loaf
The very first bread was a simple loose mixture of crushed whole
grains and water, blended into gruel, and then flattened to dry
in the sun or baked over a fire. Over the past 6000 years, the
loaf has evolved to include everything from nuts and seeds to complex
chemicals designed to make bread soft and fluffy with a long shelf
life. 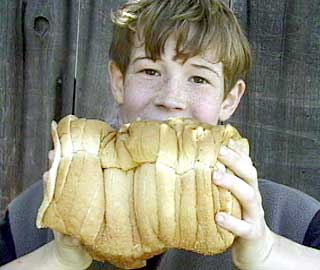 Scientists
have figured out how to remove vitamins and minerals and then add
them back in; and inventors have built machinery that can make
a loaf without being touched by human hands. Somewhere between
these two extremes is the classic handmade whole grain loaf that
is both hearty and delicious. Scientists
have figured out how to remove vitamins and minerals and then add
them back in; and inventors have built machinery that can make
a loaf without being touched by human hands. Somewhere between
these two extremes is the classic handmade whole grain loaf that
is both hearty and delicious.
Despite its reputation, it is easy and satisfying to make a fine
loaf of100% whole wheat bread. As with anything worth learning,
the keys are patience and practice along with a simple understanding
of the ingredients and how they work together. Here’s a one-loaf
recipe worth trying with all ages, from 3 on up. The ingredients
are easy to find, and the technique is simple.
Recipe
1 1/2 cups of water
1/4 cup of honey
1 packet of active dry yeast
1/4 cup of vegetable oil.
Two teaspoons of salt
3 1/2 cups of whole wheat bread flour
Procedure
The water should be lukewarm (body temperature) to help dissolve
the honey and support the growth of the yeast. Honey is for flavor
and also food for the yeast. Yeast, a living plant cell, is the
magical force that gives bread it’s lift and unique aroma.
Oil makes for a cake-like texture and helps the bread stay moist.
The salt brings out the taste of all the ingredients.
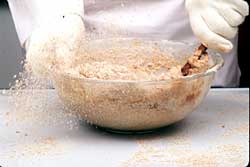 Combine the
ingredients, one at a time, in a large bowl – stirring
them together in the order presented – finally adding the
flour one cup at a time and keeping a half cup aside until the
dough is ready to knead on the table top. Combine the
ingredients, one at a time, in a large bowl – stirring
them together in the order presented – finally adding the
flour one cup at a time and keeping a half cup aside until the
dough is ready to knead on the table top.
Blend with a spoon and/or your hands until it begins to form a
lump. Then lightly dust the table top with some of the remaining
flour, turn the mound out of the bowl, and
let it rest for 10 minutes so the flour can more fully absorb the
water. Dust hands with a little of the extra flour and begin kneading
as follows: (1) gently push the dough away from you so that it
flattens out, (2) give it a quarter turn and (3) fold it in half
toward you. Think of it as push, turn, and fold. Repeat the process
as many as 100 times, dusting your hands and the table to prevent
the dough from sticking. The key here is to make sure the dough
stays moist 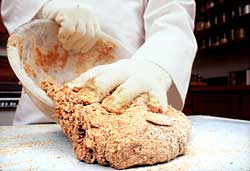 and soft – so add just enough flour during the
kneading to keep the dough from becoming stiff and dry. Some bakers
prefer to use a little vegetable oil instead of flour during the
kneading. When the kneading is done, the dough will be soft and
tender like the lobe of your ear. Pour a little oil into the mixing
bowl, and roll the kneaded dough inside the bowl so that it is
coated with the oil. Cover the bowl with a dishcloth or plastic
wrap, and let it double in size in a corner of the kitchen where
there are no drafts. and soft – so add just enough flour during the
kneading to keep the dough from becoming stiff and dry. Some bakers
prefer to use a little vegetable oil instead of flour during the
kneading. When the kneading is done, the dough will be soft and
tender like the lobe of your ear. Pour a little oil into the mixing
bowl, and roll the kneaded dough inside the bowl so that it is
coated with the oil. Cover the bowl with a dishcloth or plastic
wrap, and let it double in size in a corner of the kitchen where
there are no drafts.
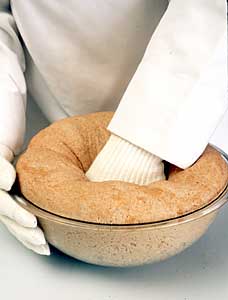 |
After about an hour, punch it
down in the bowl to release the carbon dioxide made by the
yeast. Turn it back
onto the table top and knead it another 25 to 50 times to
further develop the gluten and fully release the carbon dioxide.
Shape
it into a ball, and press it into a greased standard metal
bread pan (8 1/2 by 4 1/2 inches). Cover it with a cloth,
and let it rise until it’s about a half inch over the brim
of the pan. Bake it at 350 degrees for 45 to 60 minutes. To
know if it is done, remove it from the pan and tap the bottom.
A clear hollow sound means it’s fully baked. Set it
on a wire rack and let it cool. It is actually still baking
until
it reaches room temperature. But in this case, temptation
has its rewards.
Once you begin making your own bread, you will find countless recipes as well
as answers to all of your questions either from your own experience or from other
bakers and the hundreds of books written on the subject. Whatever recipe you
use and however the bread turns out, baking a loaf of homemade bread is a wonderful
combination of simplicity, artistry, and nutrition as well a unique way of partaking
in the history of humanity. When you have gained confidence, double the recipe.
Giving a loaf to a neighbor or friend is a most precious gift of caring and love.
|
|